Setup
How to install an AI plugin in Premiere Pro (2026 guide)
Chat Video Pro installs like other Adobe CEP extensions: you download a signed ZXP from your purchase receipt, install it with AEScripts ZXP Installer (or a compatible manager), then open the panel under Window → Extensions in Premiere Pro. The full activation flow takes a few minutes — license key, your own Fal.ai API key, and optional starter credits for generative jobs. This editorial guide mirrors the official Installation & Activation documentation so you can get the panel visible before diving into Story Cutter, Studio generation, or API setup. Close Premiere Pro before running the installer if your machine has had trouble with third-party panels in the past; restart after install so the Extensions menu refreshes. Adobe Premiere Pro 2026 (v26.x) only. Earlier versions are not officially supported or guaranteed to work. Use Windows 10+ or macOS 12+, with a stable internet connection for license validation and AI routing.
Before you install — requirements
Confirm compatibility before you touch the ZXP. Adobe Premiere Pro 2026 (v26.x) only. Earlier versions are not officially supported or guaranteed to work. On Windows, use Windows 10 64-bit or later (Windows 11 recommended). On macOS, Catalina 10.15 or newer is the minimum; Big Sur through Sonoma are recommended for daily use.
Plan for at least 8 GB RAM (16 GB is better when you run video generation), roughly 500 MB free disk for the extension, and a reliable internet connection for API calls. Adobe Media Encoder ships with Premiere and is used when Clip Export sends nested sequences or adjustment layers — you do not install it separately. You will also need an active Fal.ai account with credits and your Chat Video Pro license key from checkout before first launch.
- Adobe Premiere Pro 2026 (v26.x) only. Earlier versions are not officially supported or guaranteed to work.
- Windows 10+ or macOS 12+
- License key from your purchase email
- AEScripts ZXP Installer (Mac or Windows build from your receipt)
- Fal.ai account — Admin Key format key_id:key_secret
Corporate editors should confirm firewall access to fal.ai and subdomains before activation day. Classroom or shared machines need a license seat per machine per your package terms. If you are migrating from a trial or beta ZXP, remove the old build in ZXP Manager before installing the current signed file so version numbers in About match the Updates page.
The Compatibility doc on GitBook lists Premiere Pro 2026 (v26.x) as the only officially supported version. Earlier versions are not officially supported or guaranteed to work. Checking Help → About Adobe Premiere Pro takes thirty seconds and prevents a support thread later. Have Media Encoder available — it ships with Premiere and is invoked automatically when Clip Export needs nested sequence renders.
Step 1 — Download the signed ZXP package
After purchase you receive a receipt email from Momentohm Media or your payment processor. That message contains your personal license key and a download link for ChatVideoPro.zxp. Scroll to the View Order button on the receipt, open the order page, and download both the ZXP extension file and the AEScripts ZXP Manager installer for your operating system. If the email is missing, check spam and promotions folders first; you can also use the download area on chatvideopro.com/updates for the current signed build.
Always install the latest ZXP listed on the Updates page so Gatekeeper, Extension Manager, and Premiere see a publisher-signed package. Older ZXPs may lack fixes for new Premiere builds. Keep the license key somewhere safe — you paste it once during onboarding and can revisit Settings later if needed.
Your receipt also links AEScripts ZXP Manager — install that tool first if you have never used ZXP workflows. The order page hosts both ChatVideoPro.zxp and the platform-specific manager installer. Saving both files into a single versioned folder (for example 2026-05-CVP-install) helps IT departments redeploy cleanly on replacement laptops.
Purchase paths include chatvideopro.com checkout and bundle upgrades documented on the site; keys always arrive by email. If downloads fail, the troubleshooting doc Trouble Accessing Downloads explains alternate retrieval before you email support. Do not install unsigned ZXPs from forums — they will not match the publisher signature expected by Adobe tooling.
Step 2 — Run the ZXP installer
Install with AEScripts ZXP Installer
Launch the ZXP Manager you downloaded, then drag ChatVideoPro.zxp into the installer window. The file should appear in the list. Click Install and wait for confirmation. If Premiere was open, quit completely and relaunch so Window → Extensions can register the new panel.
Warning — close Premiere before installing
If the panel never appears after a successful ZXP install, fully quit Premiere Pro (not just close the project), run the installer again from the latest ZXP, and reopen. On macOS, verify System Settings allows the signed publisher; on Windows, confirm the extension is not blocked by corporate policy on CEP panels.
ZXP Installer shows the package name and publisher before you confirm — that dialog is your sanity check that you are not dragging an old beta build. Some studios standardize on Anastasiy Extension Manager; the Gitbook flow assumes AEScripts because it ships from the same order page as the ZXP. Either tool should list Chat Video Pro after install; if the list is empty, the drag-and-drop step did not register and you should retry with administrator privileges on Windows.
After install, the How to Update doc uses the same explorer GIF for dropping refreshed ZXPs — keep ZXP Manager installed for dot releases. Updates do not re-run the activation wizard unless release notes say otherwise; still restart Premiere so chunk caches refresh. Document the installed build number from Gear → About when you file support tickets.
Step 3 — Open Chat Video Pro inside Premiere
Start Adobe Premiere Pro and open any project (or a blank one). Go to Window → Extensions → Chat Video Pro. Dock the panel beside Lumetri, Effect Controls, or your transcript-friendly layout — most editors park it on the right stack. On first open, the activation wizard runs automatically; you do not need a separate launcher app.
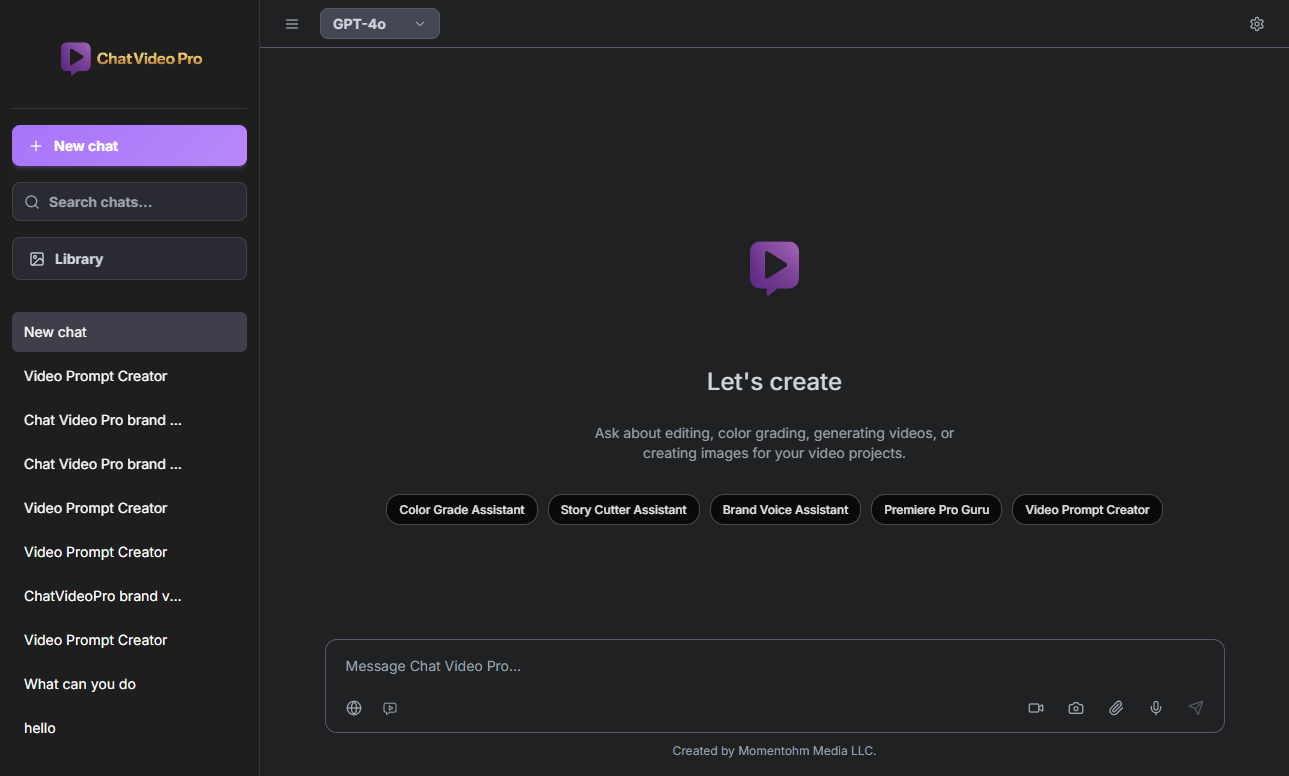
Interface Overview documentation walks the header, conversation area, and composer if this is your first CEP panel — the layout intentionally mirrors chat apps you already know. Message actions (regenerate, copy, edit, delete) appear on hover. Toolbar buttons include frame capture, clip export, voice input, and Generate Media; you do not need to configure them on day one, but knowing they exist prevents “where is import?” questions later.
Docking matters for transcript workflows: place Chat Video Pro beside the Text panel when you are exporting JSON for Story Cutter. Colorists often park it near Lumetri scopes. The panel persists per workspace; save a workspace after you find a layout that survives relaunch.
Step 4 — Activate your license key
Copy the license key from your receipt email and paste it into the activation wizard, then advance with Next. Keys are validated locally — Chat Video Pro does not phone home for day-to-day editing. If activation fails, re-copy the key without leading or trailing spaces and confirm the purchase is tied to the same email you used at checkout. Persistent failures go to chatvideopro@gmail.com with your order ID.
- Copy the full license string from the receipt
- Paste into the activation screen in the panel
- Click Next to continue to API setup
License validation is local per the privacy section of the install doc — your key is not phoned home for daily editing. That design supports offline timeline work once activation succeeds; generative features still need network access to reach FAL. If you clone drives for a second machine, confirm seat count before copying the same key — EULA limits apply.
The Installation FAQ repeats license troubleshooting: entire key, valid purchase, receipt email source, and re-copy without hidden characters. Founder Onboarding is not a support call — it is a paid live session to wire your actual project — but standard install issues should be resolved via email or Discord first.
Step 5 — Create and connect your FAL API key
Generative video, image, and many AI tools route through your own Fal.ai account. Click Get FAL Key in the wizard to open fal.ai/dashboard/keys, sign in, and create an Admin Key named for Chat Video Pro. Copy the entire key in key_id:key_secret format (both parts with the colon) and paste it into the activation field. Keys stay on your machine; they are only sent to FAL when you run a job.
Optional OpenAI and Gemini keys live under Gear → Settings → API Keys if you want those providers for chat routing. FAL is required for Studio generation and most wholesale-billed media operations documented in the Usage panel.
Common FAL errors in the install doc are wrong format (missing colon between key segments), inactive keys, zero balance, or choosing a non-Admin key type. Fix path: revisit fal.ai/dashboard/keys, copy the full string again, paste under Gear → Settings → API Keys. Story Cutter LLM routes may bill separately through OpenAI or Gemini if you configure them — those are optional for generative video but useful for long transcript reasoning.
Security notes: keys stay local except during provider API calls; generated media caches locally; transcripts and memory use on-machine storage. That privacy model is why activation and license checks do not require uploading timelines to Chat Video Pro servers.
Step 6 — Add FAL credits (pay-as-you-go)
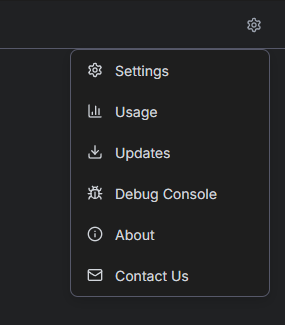
Before your first video render, add funds to FAL. Inside Chat Video Pro, open Gear → Usage, then See Balance or View in Fal Dashboard to open billing. A starting balance of $10–$20 is enough for learning; heavier Studio weeks may need more. Funds do not expire and there is no Chat Video Pro subscription tied to generation — you pay providers directly at published rates.
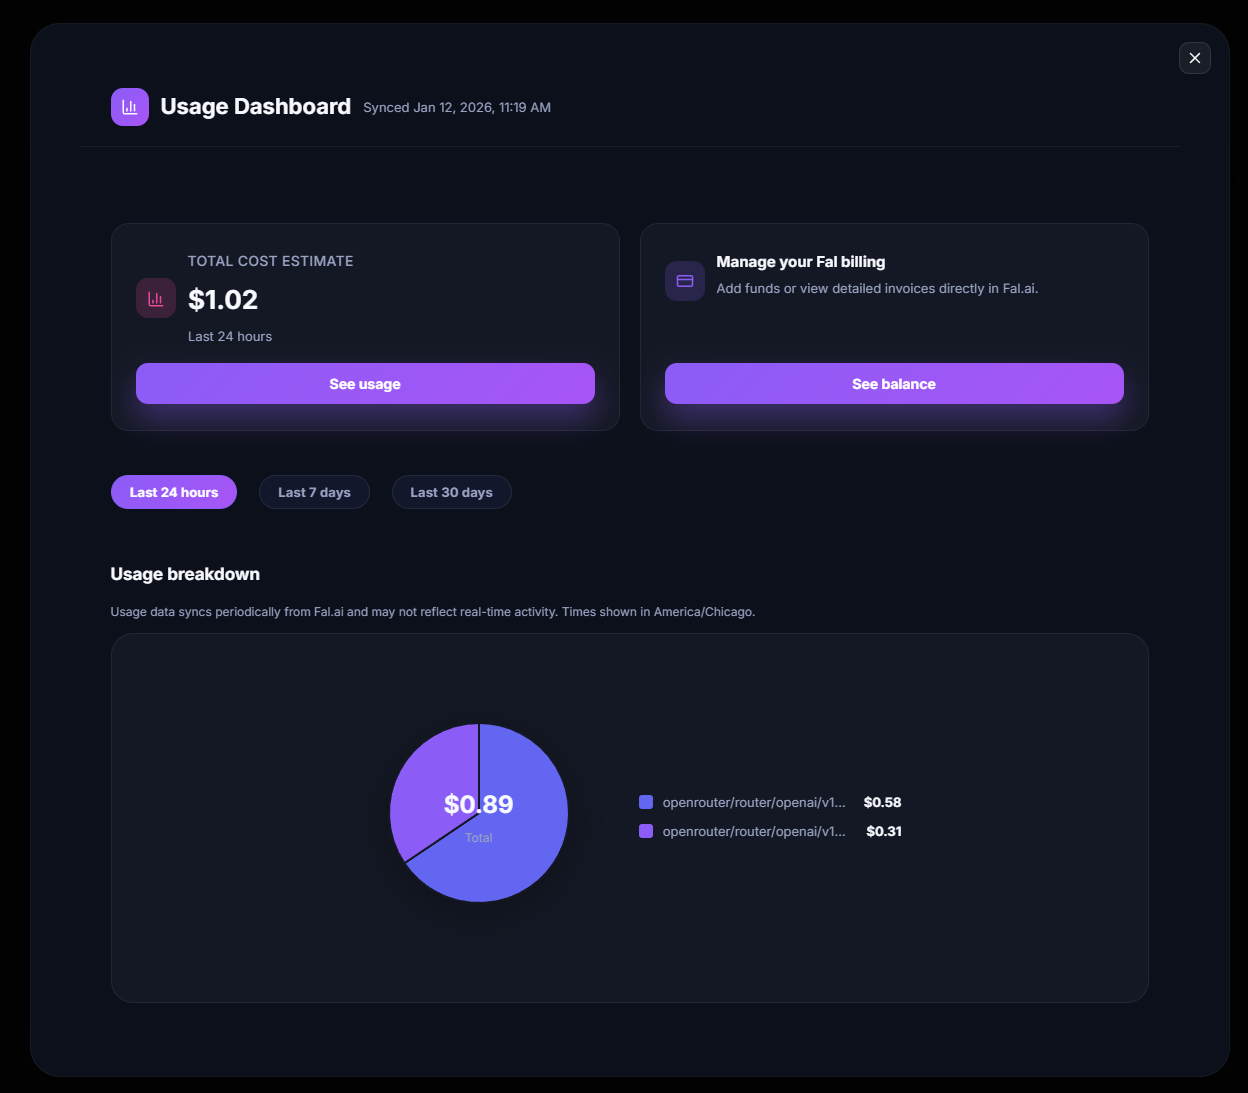
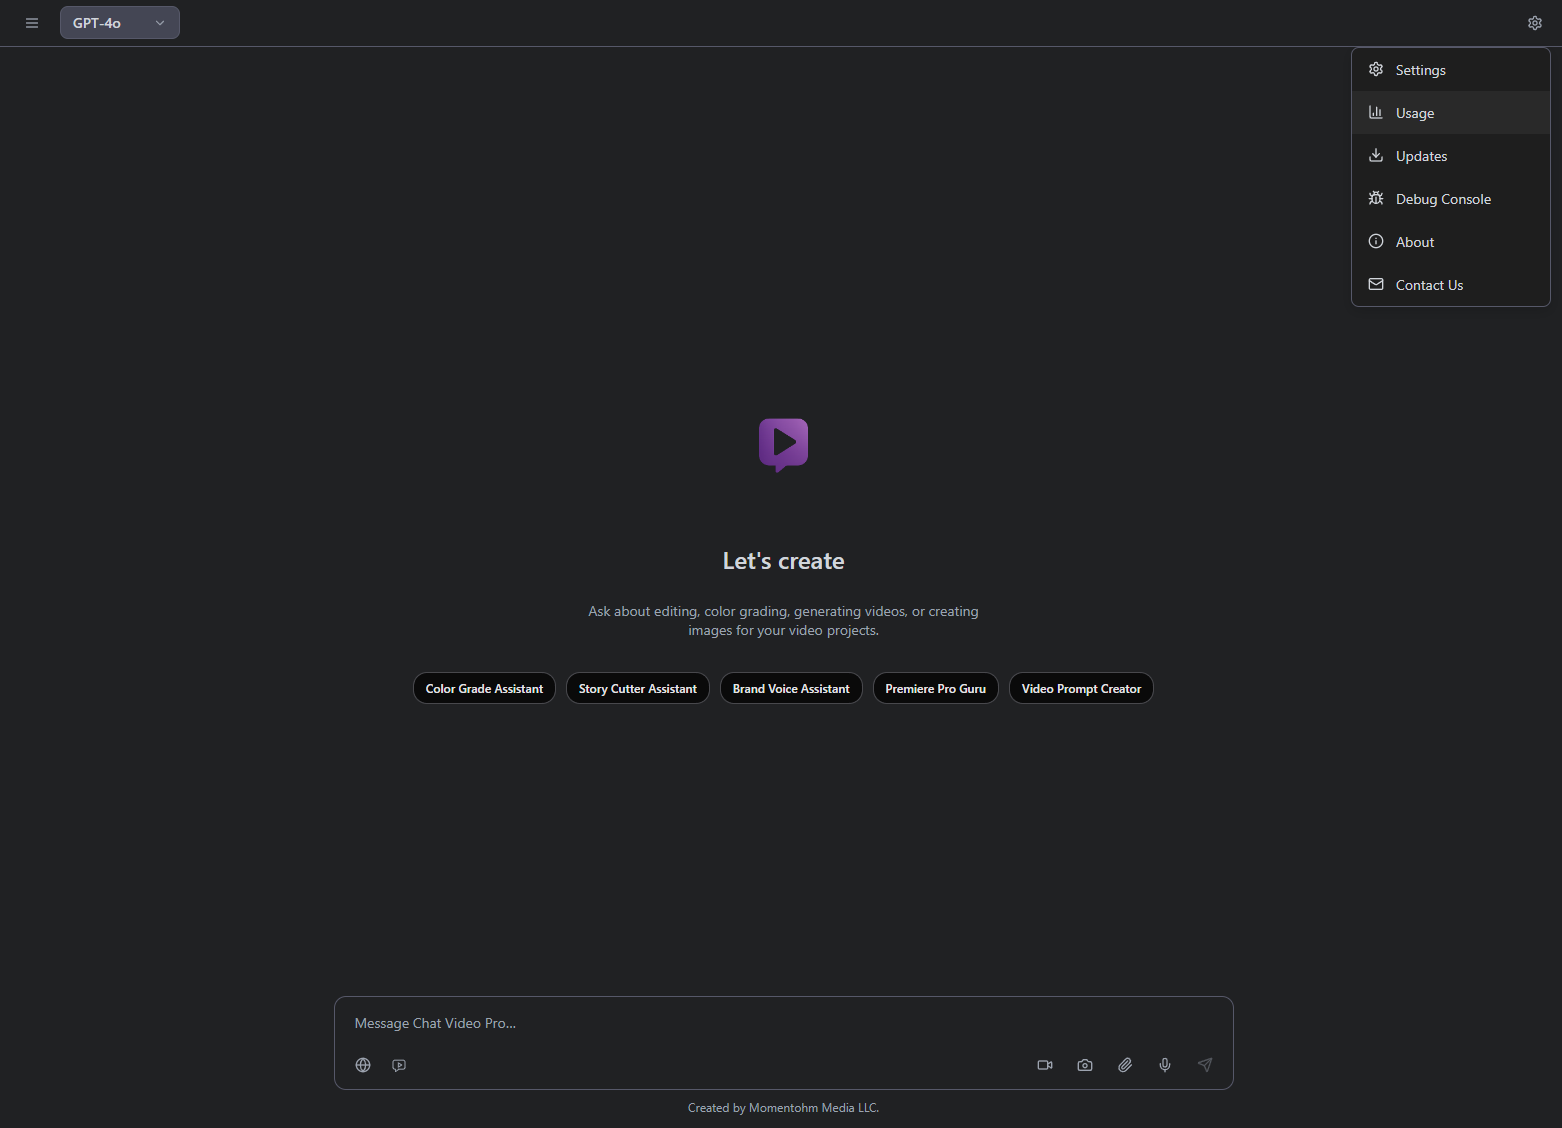
The Usage panel doc lists Refresh to sync, Add Credits for billing, and View in Fal Dashboard for granular invoices. Cost optimization tips (faster models, shorter durations, audio off, SAM preview frames) apply after install — they are not required on day one but help when you move from test prompts to client work. Auto-recharge, when available in FAL, prevents mid-render balance failures on long Studio batches.
Pay-as-you-go means no Chat Video Pro subscription for generations, no expiring credit pools, and transparent per-operation pricing published by providers. Editors on project billing can export FAL usage CSVs alongside Usage panel screenshots for producers. If Usage seems stale, click Refresh and verify internet — delays are usually on the provider sync side, not Premiere.
You are ready — next steps inside Premiere
After activation you can use AI video models (Seedance, Veo, Kling, Hailuo, WAN), upscalers, the canvas editor, ChatGPT-style assistants, and Story Cutter transcript workflows — all from the same docked panel. Visit chatvideopro.com/welcome for API tips, tutorial links, and Discord onboarding. Dock the panel near scopes for color work or beside the Text panel when you are exporting transcripts for Story Cutter.
- Watch the setup walkthrough linked from the official docs hub
- Join the Chat Video Pro Discord for editor community support
- Try the First 5 Things guide on docs for a guided first generation
Troubleshooting common install issues
Panel missing under Window → Extensions
Verify the ZXP installed without errors, confirm Premiere is 2026 (v26.x), restart Premiere, and check Window → Extensions again. If still missing, enable CEP debugging: on Windows, set PlayerDebugMode DWORD to 1 under HKCU\Software\Adobe\CSXS.11 (for the supported Premiere Pro 2026 host); on macOS, run defaults write com.adobe.CSXS.11 PlayerDebugMode 1 with the CSXS number matching your host, then restart.
License or FAL key errors
License issues are usually stray spaces or the wrong receipt. FAL keys must be Admin type with both key segments. Inactive keys, zero balance, or wrong key type show up as generation failures — refresh Usage and confirm credits in the FAL dashboard before blaming the panel.
Full step-by-step reference on Gitbook
For the complete Installation & Activation guide — embedded setup video, privacy notes, founder onboarding link, and troubleshooting appendix — open the curated Gitbook documentation. This article is an SEO-friendly summary; the docs stay the living source of truth when URLs or Premiere builds change.
→ Full install guide: https://docs.chatvideopro.com/getting-started/installation-and-activation — Compatibility: https://docs.chatvideopro.com/getting-started/compatibility
Frequently asked questions
- Why does Premiere ask to allow unsigned extensions?
- Chat Video Pro ships as a signed ZXP — use the official build from your account or /updates so Gatekeeper and Extension Manager trust the package.
- Can I install on two machines?
- Seat limits depend on your package — check your checkout receipt and the EULA for how many activations are included.
- The panel is missing after install — what now?
- Restart Premiere, reinstall the latest ZXP, and enable CEP PlayerDebugMode if your studio blocks third-party panels by default.
- Where is the full technical reference?
- docs.chatvideopro.com covers API keys, troubleshooting, version-specific notes, and the Usage panel beyond this install overview.
Try Chat Video Pro
AI rough cuts, Studio generation, and wholesale billing — all inside Adobe Premiere Pro. One-time license, no platform subscription.
Related guides
- How to make an AI rough cut inside Premiere Pro →
- Why pay-per-use AI beats credit-based subscriptions for editors →
- Transcript-based editing: the fastest workflow for interview and podcast video →
- The best AI video generation models for cinematic work in 2026 →
- Multi-angle AI generation: replace multi-cam shoots inside Premiere →
Technical reference: docs.chatvideopro.com